- Upload上传
- 何时使用
- 代码演示
- API
- onChange
- FAQ
- 服务端如何实现?
- 如何显示下载链接?
- customRequest 怎么使用?
- IE8/9 问题
Upload上传
文件选择上传和拖拽上传控件。
何时使用
上传是将信息(网页、文字、图片、视频等)通过网页或者上传工具发布到远程服务器上的过程。
当需要上传一个或一些文件时。
当需要展现上传的进度时。
当需要使用拖拽交互时。
代码演示

点击上传
经典款式,用户点击按钮弹出文件选择框。
import { Upload, message, Button, Icon } from 'antd';const props = {name: 'file',action: 'https://www.mocky.io/v2/5cc8019d300000980a055e76',headers: {authorization: 'authorization-text',},onChange(info) {if (info.file.status !== 'uploading') {console.log(info.file, info.fileList);}if (info.file.status === 'done') {message.success(`${info.file.name} file uploaded successfully`);} else if (info.file.status === 'error') {message.error(`${info.file.name} file upload failed.`);}},};ReactDOM.render(<Upload {...props}><Button><Icon type="upload" /> Click to Upload</Button></Upload>,mountNode,);

已上传的文件列表
使用 defaultFileList 设置已上传的内容。
import { Upload, Button, Icon } from 'antd';const props = {action: 'https://www.mocky.io/v2/5cc8019d300000980a055e76',onChange({ file, fileList }) {if (file.status !== 'uploading') {console.log(file, fileList);}},defaultFileList: [{uid: '1',name: 'xxx.png',status: 'done',response: 'Server Error 500', // custom error message to showurl: 'http://www.baidu.com/xxx.png',},{uid: '2',name: 'yyy.png',status: 'done',url: 'http://www.baidu.com/yyy.png',},{uid: '3',name: 'zzz.png',status: 'error',response: 'Server Error 500', // custom error message to showurl: 'http://www.baidu.com/zzz.png',},],};ReactDOM.render(<Upload {...props}><Button><Icon type="upload" /> Upload</Button></Upload>,mountNode,);

完全控制的上传列表
使用 fileList 对列表进行完全控制,可以实现各种自定义功能,以下演示三种情况:
上传列表数量的限制。
读取远程路径并显示链接。
import { Upload, Button, Icon } from 'antd';class MyUpload extends React.Component {state = {fileList: [{uid: '-1',name: 'xxx.png',status: 'done',url: 'http://www.baidu.com/xxx.png',},],};handleChange = info => {let fileList = [...info.fileList];// 1. Limit the number of uploaded files// Only to show two recent uploaded files, and old ones will be replaced by the newfileList = fileList.slice(-2);// 2. Read from response and show file linkfileList = fileList.map(file => {if (file.response) {// Component will show file.url as linkfile.url = file.response.url;}return file;});this.setState({ fileList });};render() {const props = {action: 'https://www.mocky.io/v2/5cc8019d300000980a055e76',onChange: this.handleChange,multiple: true,};return (<Upload {...props} fileList={this.state.fileList}><Button><Icon type="upload" /> Upload</Button></Upload>);}}ReactDOM.render(<MyUpload />, mountNode);

文件夹上传
支持上传一个文件夹里的所有文件。
import { Upload, Button, Icon } from 'antd';ReactDOM.render(<Upload action="https://www.mocky.io/v2/5cc8019d300000980a055e76" directory><Button><Icon type="upload" /> Upload Directory</Button></Upload>,mountNode,);

图片列表样式
上传文件为图片,可展示本地缩略图。IE8/9 不支持浏览器本地缩略图展示(Ref),可以写 thumbUrl 属性来代替。
import { Upload, Button, Icon } from 'antd';const fileList = [{uid: '-1',name: 'xxx.png',status: 'done',url: 'https://zos.alipayobjects.com/rmsportal/jkjgkEfvpUPVyRjUImniVslZfWPnJuuZ.png',thumbUrl: 'https://zos.alipayobjects.com/rmsportal/jkjgkEfvpUPVyRjUImniVslZfWPnJuuZ.png',},{uid: '-2',name: 'yyy.png',status: 'done',url: 'https://zos.alipayobjects.com/rmsportal/jkjgkEfvpUPVyRjUImniVslZfWPnJuuZ.png',thumbUrl: 'https://zos.alipayobjects.com/rmsportal/jkjgkEfvpUPVyRjUImniVslZfWPnJuuZ.png',},];const props = {action: 'https://www.mocky.io/v2/5cc8019d300000980a055e76',listType: 'picture',defaultFileList: [...fileList],};const props2 = {action: 'https://www.mocky.io/v2/5cc8019d300000980a055e76',listType: 'picture',defaultFileList: [...fileList],className: 'upload-list-inline',};ReactDOM.render(<div><Upload {...props}><Button><Icon type="upload" /> Upload</Button></Upload><br /><br /><Upload {...props2}><Button><Icon type="upload" /> Upload</Button></Upload></div>,mountNode,);
/* tile uploaded pictures */.upload-list-inline .ant-upload-list-item {float: left;width: 200px;margin-right: 8px;}.upload-list-inline .ant-upload-animate-enter {animation-name: uploadAnimateInlineIn;}.upload-list-inline .ant-upload-animate-leave {animation-name: uploadAnimateInlineOut;}

用户头像
点击上传用户头像,并使用 beforeUpload 限制用户上传的图片格式和大小。
beforeUpload的返回值可以是一个 Promise 以支持异步处理,如服务端校验等:示例。
import { Upload, Icon, message } from 'antd';function getBase64(img, callback) {const reader = new FileReader();reader.addEventListener('load', () => callback(reader.result));reader.readAsDataURL(img);}function beforeUpload(file) {const isJPG = file.type === 'image/jpeg';if (!isJPG) {message.error('You can only upload JPG file!');}const isLt2M = file.size / 1024 / 1024 < 2;if (!isLt2M) {message.error('Image must smaller than 2MB!');}return isJPG && isLt2M;}class Avatar extends React.Component {state = {loading: false,};handleChange = info => {if (info.file.status === 'uploading') {this.setState({ loading: true });return;}if (info.file.status === 'done') {// Get this url from response in real world.getBase64(info.file.originFileObj, imageUrl =>this.setState({imageUrl,loading: false,}),);}};render() {const uploadButton = (<div><Icon type={this.state.loading ? 'loading' : 'plus'} /><div className="ant-upload-text">Upload</div></div>);const imageUrl = this.state.imageUrl;return (<Uploadname="avatar"listType="picture-card"className="avatar-uploader"showUploadList={false}action="https://www.mocky.io/v2/5cc8019d300000980a055e76"beforeUpload={beforeUpload}onChange={this.handleChange}>{imageUrl ? <img src={imageUrl} alt="avatar" /> : uploadButton}</Upload>);}}ReactDOM.render(<Avatar />, mountNode);
.avatar-uploader > .ant-upload {width: 128px;height: 128px;}

照片墙
用户可以上传图片并在列表中显示缩略图。当上传照片数到达限制后,上传按钮消失。
import { Upload, Icon, Modal } from 'antd';class PicturesWall extends React.Component {state = {previewVisible: false,previewImage: '',fileList: [{uid: '-1',name: 'xxx.png',status: 'done',url: 'https://zos.alipayobjects.com/rmsportal/jkjgkEfvpUPVyRjUImniVslZfWPnJuuZ.png',},],};handleCancel = () => this.setState({ previewVisible: false });handlePreview = file => {this.setState({previewImage: file.url || file.thumbUrl,previewVisible: true,});};handleChange = ({ fileList }) => this.setState({ fileList });render() {const { previewVisible, previewImage, fileList } = this.state;const uploadButton = (<div><Icon type="plus" /><div className="ant-upload-text">Upload</div></div>);return (<div className="clearfix"><Uploadaction="https://www.mocky.io/v2/5cc8019d300000980a055e76"listType="picture-card"fileList={fileList}onPreview={this.handlePreview}onChange={this.handleChange}>{fileList.length >= 3 ? null : uploadButton}</Upload><Modal visible={previewVisible} footer={null} onCancel={this.handleCancel}><img alt="example" style={{ width: '100%' }} src={previewImage} /></Modal></div>);}}ReactDOM.render(<PicturesWall />, mountNode);
/* you can make up upload button and sample style by using stylesheets */.ant-upload-select-picture-card i {font-size: 32px;color: #999;}.ant-upload-select-picture-card .ant-upload-text {margin-top: 8px;color: #666;}
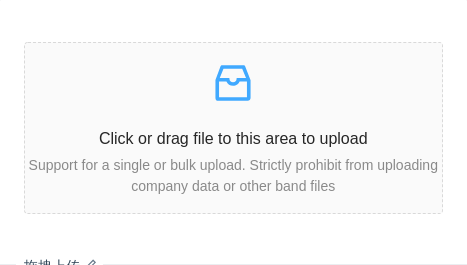
拖拽上传
把文件拖入指定区域,完成上传,同样支持点击上传。
设置 multiple 后,在 IE10+ 可以一次上传多个文件。
import { Upload, Icon, message } from 'antd';const Dragger = Upload.Dragger;const props = {name: 'file',multiple: true,action: 'https://www.mocky.io/v2/5cc8019d300000980a055e76',onChange(info) {const status = info.file.status;if (status !== 'uploading') {console.log(info.file, info.fileList);}if (status === 'done') {message.success(`${info.file.name} file uploaded successfully.`);} else if (status === 'error') {message.error(`${info.file.name} file upload failed.`);}},};ReactDOM.render(<Dragger {...props}><p className="ant-upload-drag-icon"><Icon type="inbox" /></p><p className="ant-upload-text">Click or drag file to this area to upload</p><p className="ant-upload-hint">Support for a single or bulk upload. Strictly prohibit from uploading company data or otherband files</p></Dragger>,mountNode,);

手动上传
beforeUpload 返回 false 后,手动上传文件。
import { Upload, Button, Icon, message } from 'antd';import reqwest from 'reqwest';class Demo extends React.Component {state = {fileList: [],uploading: false,};handleUpload = () => {const { fileList } = this.state;const formData = new FormData();fileList.forEach(file => {formData.append('files[]', file);});this.setState({uploading: true,});// You can use any AJAX library you likereqwest({url: 'https://www.mocky.io/v2/5cc8019d300000980a055e76',method: 'post',processData: false,data: formData,success: () => {this.setState({fileList: [],uploading: false,});message.success('upload successfully.');},error: () => {this.setState({uploading: false,});message.error('upload failed.');},});};render() {const { uploading, fileList } = this.state;const props = {onRemove: file => {this.setState(state => {const index = state.fileList.indexOf(file);const newFileList = state.fileList.slice();newFileList.splice(index, 1);return {fileList: newFileList,};});},beforeUpload: file => {this.setState(state => ({fileList: [...state.fileList, file],}));return false;},fileList,};return (<div><Upload {...props}><Button><Icon type="upload" /> Select File</Button></Upload><Buttontype="primary"onClick={this.handleUpload}disabled={fileList.length === 0}loading={uploading}style={{ marginTop: 16 }}>{uploading ? 'Uploading' : 'Start Upload'}</Button></div>);}}ReactDOM.render(<Demo />, mountNode);

自定义预览
自定义本地预览,用于处理非图片格式文件(例如视频文件)。
import { Upload, Button, Icon } from 'antd';const props = {action: '//jsonplaceholder.typicode.com/posts/',listType: 'picture',previewFile(file) {console.log('Your upload file:', file);// Your process logic. Here we just mock to the same filereturn fetch('https://next.json-generator.com/api/json/get/4ytyBoLK8', {method: 'POST',body: file,}).then(res => res.json()).then(({ thumbnail }) => thumbnail);},};ReactDOM.render(<div><Upload {...props}><Button><Icon type="upload" /> Upload</Button></Upload></div>,mountNode,);
API
| 参数 | 说明 | 类型 | 默认值 | 版本 |
|---|---|---|---|---|
| accept | 接受上传的文件类型, 详见 input accept Attribute | string | 无 | |
| action | 上传的地址 | string|(file) => Promise | 无 | |
| directory | 支持上传文件夹(caniuse) | boolean | false | |
| beforeUpload | 上传文件之前的钩子,参数为上传的文件,若返回 false 则停止上传。支持返回一个 Promise 对象,Promise 对象 reject 时则停止上传,resolve 时开始上传( resolve 传入 File 或 Blob 对象则上传 resolve 传入对象)。注意:IE9 不支持该方法。 | (file, fileList) => boolean | Promise | 无 | |
| customRequest | 通过覆盖默认的上传行为,可以自定义自己的上传实现 | Function | 无 | |
| data | 上传所需参数或返回上传参数的方法 | object|(file) => object | 无 | |
| defaultFileList | 默认已经上传的文件列表 | object[] | 无 | |
| disabled | 是否禁用 | boolean | false | |
| fileList | 已经上传的文件列表(受控),使用此参数时,如果遇到 onChange 只调用一次的问题,请参考 #2423 | object[] | 无 | |
| headers | 设置上传的请求头部,IE10 以上有效 | object | 无 | |
| listType | 上传列表的内建样式,支持三种基本样式 text, picture 和 picture-card | string | 'text' | |
| multiple | 是否支持多选文件,ie10+ 支持。开启后按住 ctrl 可选择多个文件 | boolean | false | |
| name | 发到后台的文件参数名 | string | 'file' | |
| previewFile | 自定义文件预览逻辑 | (file: File | Blob) => Promise<dataURL: string> | 无 | 3.17.0 |
| showUploadList | 是否展示文件列表, 可设为一个对象,用于单独设定 showPreviewIcon 和 showRemoveIcon | Boolean or { showPreviewIcon?: boolean, showRemoveIcon?: boolean } | true | |
| supportServerRender | 服务端渲染时需要打开这个 | boolean | false | |
| withCredentials | 上传请求时是否携带 cookie | boolean | false | |
| openFileDialogOnClick | 点击打开文件对话框 | boolean | true | |
| onChange | 上传文件改变时的状态,详见 onChange | Function | 无 | |
| onPreview | 点击文件链接或预览图标时的回调 | Function(file) | 无 | |
| onRemove | 点击移除文件时的回调,返回值为 false 时不移除。支持返回一个 Promise 对象,Promise 对象 resolve(false) 或 reject 时不移除。 | Function(file): boolean | Promise | 无 |
onChange
上传中、完成、失败都会调用这个函数。
文件状态改变的回调,返回为:
{file: { /* ... */ },fileList: [ /* ... */ ],event: { /* ... */ },}
file当前操作的文件对象。
{uid: 'uid', // 文件唯一标识,建议设置为负数,防止和内部产生的 id 冲突name: 'xx.png' // 文件名status: 'done', // 状态有:uploading done error removedresponse: '{"status": "success"}', // 服务端响应内容linkProps: '{"download": "image"}', // 下载链接额外的 HTML 属性}
fileList当前的文件列表。event上传中的服务端响应内容,包含了上传进度等信息,高级浏览器支持。
FAQ
服务端如何实现?
服务端上传接口实现可以参考 jQuery-File-Upload。
如果要做本地 mock 可以参考这个 express 的例子。
如何显示下载链接?
请使用 fileList 属性设置数组项的 url 属性进行展示控制。
customRequest 怎么使用?
请参考 https://github.com/react-component/upload#customrequest。
IE8/9 问题
请参考 https://github.com/react-component/upload#ie89-note。
