- 脚手架
- Vue UI
- 安装
- NPM or Yarn
- 浏览器引入
- 引入
- 按需加载(推荐)
- 按需引入
- 全量引入
- 使用前准备
- Normalize or Reset
- FastClick
- 产出包目录
- Px to Rem
- 配置主题和字体
- 使用
快速上手
脚手架
新项目可通过vue-cli初始化集成mand-mobile,现有项目集成请参考安装)
- Vue CLI 2/3(模板)(支持1.x)
vue init mand-mobile/mand-mobile-template my-mand-mobile-project
- Vue CLI 3(插件)(支持1.x/2.x)
vue create my-projectcd my-projectnpm install --save-dev vue-cli-plugin-mandvue invoke mand
Vue CLI 3(示例)(支持1.x/2.x)
Nuxt(示例)
Vue UI
通过Vue UI以图形化界面创建和管理项目,并通过安装插件vue-cli-plugin-mand集成mand-mobile
- 启动
Vue UI
vue ui
- 完成项目创建后,点击插件并搜索
mand-mobile,点击搜索结果完成安装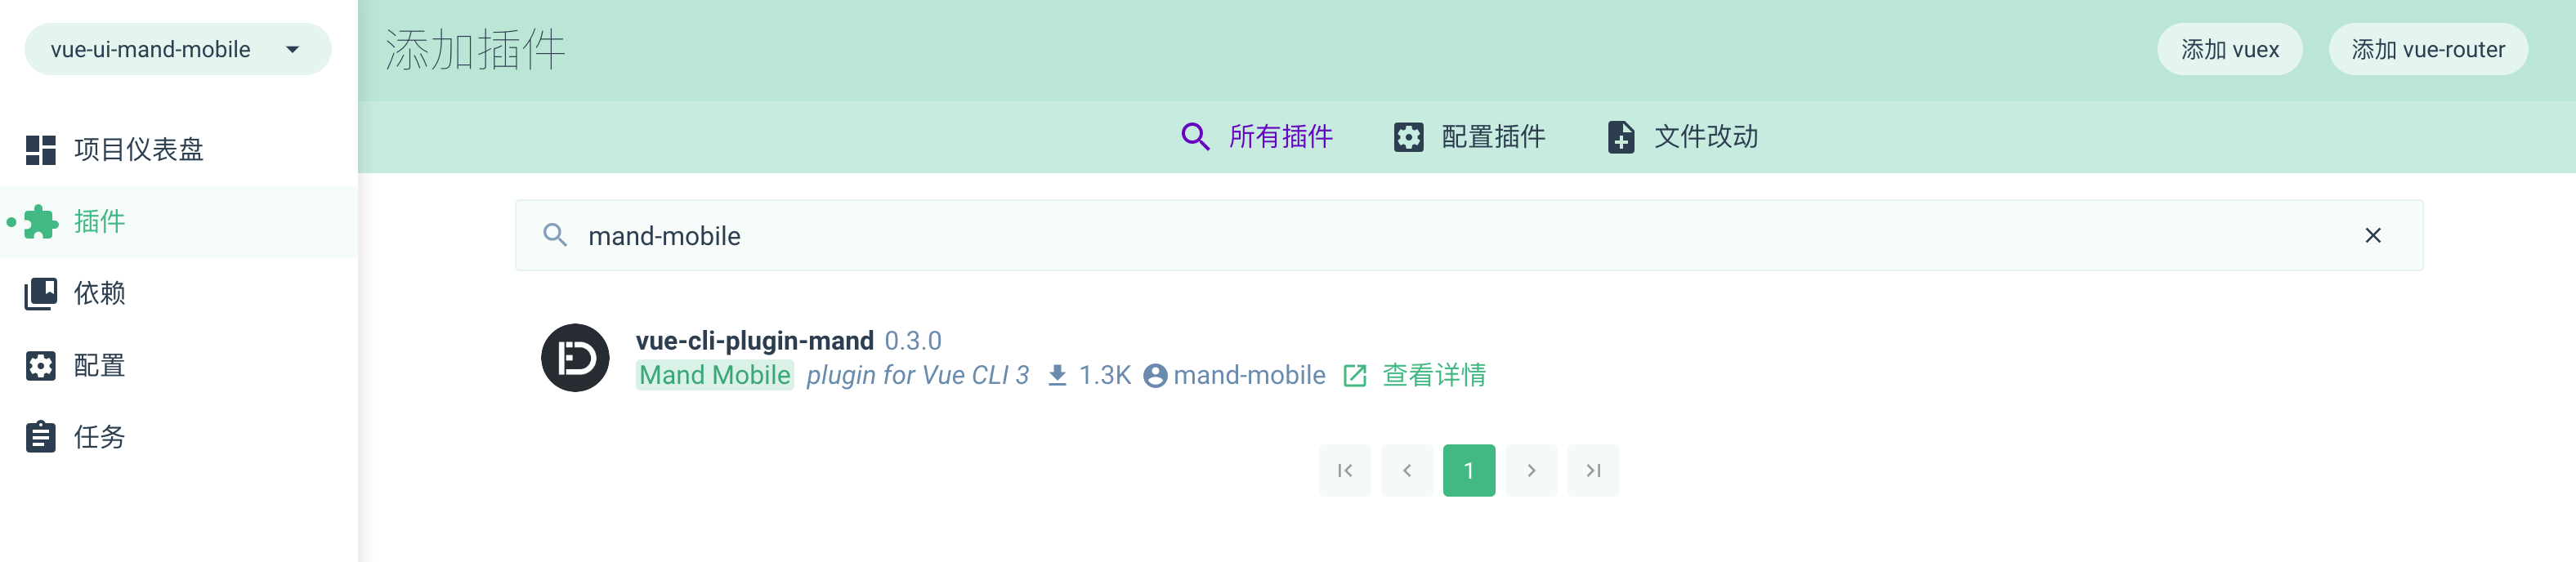
安装
NPM or Yarn
npm install mand-mobile --save# ORyarn add mand-mobile
浏览器引入
在浏览器中使用script和link标签直接引入文件,并使用全局变量 window['mand-mobile']。
在npm发布包内的mand-mobile/lib或mand-mobile/lib-vw目录下提供了JS以及CSS bundle,参考产出包目录)。
你也可以通过 或者UNPKG进行下载。
建议直接使用 CDN 引入时锁定版本,以免将来受到非兼容性更新的影响。锁定版本的方法请查看unpkg.com。
引入
按需加载(推荐)
使用 babel-plugin-import 或 ts-import-plugin, 无需配置style,默认加载目录为lib,其他目录参考产出包目录
{"plugins": [["import", {"libraryName": "mand-mobile","libraryDirectory": "lib"}]]}
// ts-loader option{rules: [{test: /\.tsx?$/,loader: 'ts-loader',options: {appendTsSuffixTo: [/\.vue$/],transpileOnly: true,getCustomTransformers: () => ({before: [require('ts-import-plugin')({"libraryName": "mand-mobile"})]})}}]}
组件使用:
如果没有以上配置,会全量引入,需手动引入全部样式, 参考全量引入
import { Button } from 'mand-mobile'
按需引入
import Button from 'mand-mobile/lib/button'
全量引入
import Vue from 'vue'import mandMobile from 'mand-mobile'import 'mand-mobile/lib/mand-mobile.css'Vue.use(mandMobile)
使用前准备
Normalize or Reset
为标准化浏览器元素的样式,推荐引入Normalize.css或Reset CSS
FastClick
为避免浏览器兼容问题引起的点击问题, 推荐引入FastClick
import FastClick from 'fastclick'if ('addEventListener' in document && 'ontouchstart' in window) {FastClick.prototype.focus = function (targetElement) {targetElement.focus()}document.addEventListener('DOMContentLoaded', function () {FastClick.attach(document.body)}, false)}
产出包目录
产出包中包含以下几种不同目录,分别适用于不同场景的代码,可根据实际需要选择一个目录加载:
├── mand-mobile├── components # 源码,一般自定义主题等├── lib # 编译后,样式单位px,一般用于自定义适配方案等(默认)├── lib-vw # 编译后,样式单位vh/vw,一般用于非兼容场景,无需额外配置├── ...
Px to Rem
产出包lib目录中的组件样式以px为单位,并且以iPhone6屏幕 “物理像素” 宽度750为基准 (即普通 “逻辑像素” 值的2倍大小)。在实际项目中,可根据具体情况使用postcss-pxtorem把px单位转成rem,从而实现不同设备下等比缩放的效果。
如转换基准为1rem = 100px:
.postcssrc.js配置
module.exports = {plugins: [require('postcss-pxtorem')({rootValue: 100,minPixelValue: 2,propWhiteList: []})]}
webpack配置
const pxtorem = require('postcss-pxtorem');// PostcsswebpackConfig.postcss.push(pxtorem({rootValue: 100,minPixelValue: 2,propWhiteList: []}))// Poststylus(使用源码时)const poststylus = require('poststylus')webpackConfig.plugins.push(new webpack.LoaderOptionsPlugin({options: {stylus: {use: [poststylus(pxtorem({rootValue: 100,minPixelValue: 2,propWhiteList: []}))]}}}))
如何使配置仅作用于
mand-mobile?
配置主题和字体
- 改变主题
- 使用本地字体
使用
这是一个使用Mand Mobile组件开发而成的表单页面
