- 购物车
- 1. 添加购物车 路由
- 2. 添加查看购物车的vue页面
- 3. 增加对应的组件
- 看效果
- 总结
购物车
购物车具备两个功能:
- 保存用户需要的数据
- 清空
所以,我们使用vuex来实现购物车
1. 添加购物车 路由
向 文件 src/router/index.js 中增加内容:
import Cart from '@/components/Cart'Vue.use(Router)export default new Router({routes: [{ path: '/cart',name: 'Cart',component: Cart},]})
2. 添加查看购物车的vue页面
新增 src/components/Car.vue 文件,内容如下:
<template><div class="background"><div id="my_cart"><CartHeaderView></CartHeaderView><CartMainView></CartMainView><NavBottomView :is_cart="is_cart"></NavBottomView></div></div></template><script>import CartHeaderView from './CartHeader.vue';import CartMainView from './CartMain.vue';import NavBottomView from './NavBottom.vue';export default{data () {return {is_cart: true}},mounted(){},components:{CartHeaderView,CartMainView,NavBottomView}}</script>
3. 增加对应的组件
3.1 新增购物车的头部文件 src/components/CartHeader.vue:
<template><div id="carttp"><header class="top_bar"><a onclick="window.history.go(-1)" class="icon_back"></a><h3 class="cartname">购物车</h3></header></div></template>
3.2 新增购物车的主体内容 src/components/CartMain.vue:
<template><main class="cart_box"><p v-show="!products.length"><i>请选择商品加入到购物车</i></p><div class="cart_content clearfix" v-for="item in products" style="position: relative;"><div class="cart_shop clearfix"><div class="cart_check_box"><div class="check_box" checked></div></div><div class="shop_info clearfix"><span class="shop_name" style="font-size: 14px;">丝路乐购新疆商城</span></div></div><div @click="find_item_id(item)" class="cart_del clearfix" style="display: inline-block; position: absolute; top: 10px; right: 10px;"><div class="del_top"></div><div class="del_bottom"></div></div><div class="cart_item"><div class="cart_item_box"><div class="check_box"></div></div><div class="cart_detial_box clearfix"><a class="cart_product_link"><img :src="item.image" alt=""></a><div class="item_names"><a><span>{{item.title}}</span></a></div><div class="cart_weight"><span class="my_color" style="color: #979292;">{{item.title}}</span></div><div class="cart_product_sell"><span class="product_money">¥<strong class="real_money">{{item.price}}</strong></span><div class="cart_add clearfix"><span @click="minus(item.id)" class="my_jian">-</span><input type="tel" class="my_count" :value="item.quantity"><span @click="add(item.id)" class="my_add">+</span></div></div></div></div></div><div class="pop" style="display: none"><div class="pop_box"><div class="del_info">确定要删除该商品吗?</div><div class="del_cancel">取消</div><div @click="deleteItem" class="del_ok">确定</div></div></div><div class="cart_fo"><footer class="cart_footer"><div class="count_money_box"><div class="heji"><strong>合计:</strong><strong style="color: #ff621a; font-size: 18px;">\{\{ total | currency }}</strong></div><a :disabled="!products.length" @click="checkout(products)" class="go_pay"><span style="color: #f5f5f5; font-weight: 600;">结算</span></a></div></footer></div></main></template><script>import { mapGetters } from 'vuex'import { go } from '../libs/router'import {check,animatDelBox} from '../assets/js/cart.js'export default{data(){return{need_delete_item: {},cartDatas:[ ],}},mounted(){check();animatDelBox();},computed: {...mapGetters({products: 'cartProducts',checkoutStatus: 'checkoutStatus'}),total () {return this.products.reduce((total, item) => {return total + item.price * item.quantity}, 0)}},methods: {// 跳转到支付页面checkout (products) {go("/shops/dingdanzhifu", this.$router)},// 对于商品的数量进行增加add (id) {this.$store.dispatch('changeItemNumber', {id, type: 'add'})},// 对于商品的数量进行减少minus (id) {this.$store.dispatch('changeItemNumber', {id, type: 'minus'})},// 删除某个商品deleteItem () {this.$store.dispatch('deleteItem', this.need_delete_item.id)},find_item_id (item) {this.need_delete_item = item}},}</script>
3.3 修改Vuex的函数
把下面代码添加到 src/vuex/actions.js 文件中:
export const deleteItem = ({ commit }, id) => {commit(types.DELETE_ITEM, {id: parseInt(id)})}export const changeItemNumber = ({ commit }, {id, type}) => {console.info(id)commit(types.CHANGE_ONE_QUANTITY, {id: parseInt(id),type})}
上面的代码, 实现了购物车的若干功能:
- 对于商品数量的增减
- 实现了当商品数量改变时,商品总价也跟着修改。
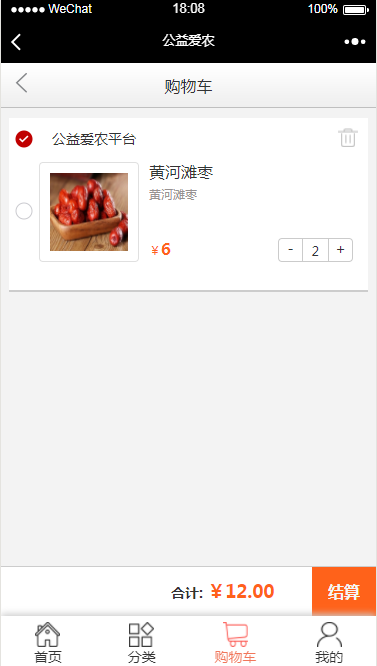
看效果
购物车做好后,点击打开,如下图所示:
总结
- 购物车的数据, 是通过Vuex来保存的
- 购物车中数量的加减,是需要直接影响到商品总价的。 这个角度来看,用Vuex来做更加适合。
